Code Examples
Now let’s take a look at some examples. As always, we’ll start with “Hello, World!”.
“Hello, World!” example
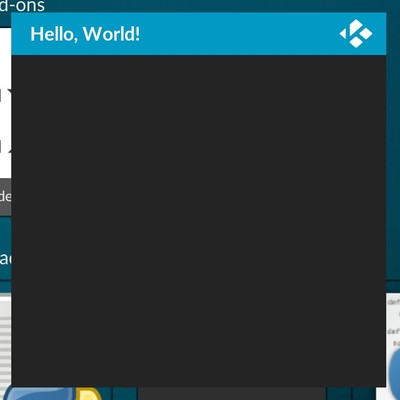
The simplest code which will display a window with “Hello, World!” header looks like this:
# Import PyXBMCt module.
import pyxbmct

# Create a window instance.
window = pyxbmct.AddonDialogWindow('Hello, World!')
# Set window width, height and grid resolution.
window.setGeometry(400, 400, 1, 1)
# Show the created window.
window.doModal()
# Delete the window instance when it is no longer used.
del window
If you’ve done everything correctly, you should see a window like the one shown below:
“Hello World!” example
The window Grid has 1 row and 1 column. We haven’t placed any controls on it, but setGeometry method takes
at least 4 arguments, so we have provided it dummy values.
Also for simplicity’s sake we haven’t used OOP in this example.
Now let’s analyze a more complex example.
Example with interactive controls
First, we need to draft the layout or our UI. You can use a pen and paper or imagine the layout in your head, it does not matter. The following table showsh the draft of the UI layout for our example addon:
Rows\Columns |
0 |
1 |
0 |
Image |
|
1 |
||
2 |
||
3 |
Name Label |
Name Edit |
4 |
“Close” button |
“Hello” button |
As you can see, our example UI will have 4 rows, 2 columns and 5 controls placed in grid cells. Let’s see how it looks in Python code:
# Import necessary modules
import xbmc
import pyxbmct

# Create a class for our UI
class MyAddon(pyxbmct.AddonDialogWindow):

    def __init__(self, title=''):
        """Class constructor"""
        # Call the base class' constructor.
        super(MyAddon, self).__init__(title)
        # Set width, height and the grid parameters
        self.setGeometry(300, 280, 5, 2)
        # Call set controls method
        self.set_controls()
        # Call set navigation method.
        self.set_navigation()
        # Connect Backspace button to close our addon.
        self.connect(pyxbmct.ACTION_NAV_BACK, self.close)

    def set_controls(self):
        """Set up UI controls"""
        # Image control
        image = pyxbmct.Image('https://peach.blender.org/wp-content/uploads/poster_rodents_small.jpg?3016dc')
        self.placeControl(image, 0, 0, rowspan=3, columnspan=2)
        # Text label
        label = pyxbmct.Label('Your name:')
        self.placeControl(label, 3, 0)
        # Text edit control
        self.name_field = pyxbmct.Edit('')
        self.placeControl(self.name_field, 3, 1)
        # Close button
        self.close_button = pyxbmct.Button('Close')
        self.placeControl(self.close_button, 4, 0)
        # Connect close button
        self.connect(self.close_button, self.close)
        # Hello button.
        self.hello_buton = pyxbmct.Button('Hello')
        self.placeControl(self.hello_buton, 4, 1)
        # Connect Hello button.
        self.connect(self.hello_buton, lambda:
            xbmc.executebuiltin('Notification(Hello {0}!, Welcome to PyXBMCt.)'.format(
                self.name_field.getText())))

    def set_navigation(self):
        """Set up keyboard/remote navigation between controls."""
        self.name_field.controlUp(self.hello_buton)
        self.name_field.controlDown(self.hello_buton)
        self.close_button.controlLeft(self.hello_buton)
        self.close_button.controlRight(self.hello_buton)
        self.hello_buton.setNavigation(self.name_field, self.name_field, self.close_button, self.close_button)
        # Set initial focus.
        self.setFocus(self.name_field)


if __name__ == '__main__':
    myaddon = MyAddon('PyXBMCt Example')
    myaddon.doModal()
    del myaddon
This code should display the following window:
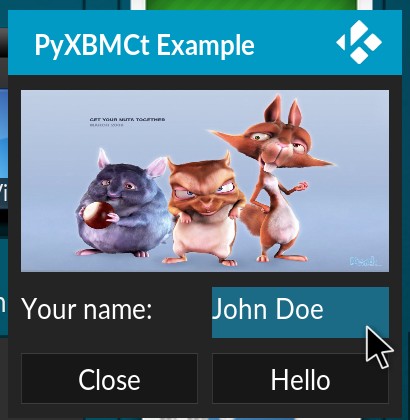
Our example UI
If you enter your name (or any words for that matter) and click “Hello” button, the addon will display a pop-up notification:

The pop-up notification
Two remarks about the code:
In my example I have used an online URL for the Image control. Paths to image files stored on your local disks can be used as well.
Note the usage of
lambdato connect a function (xbmc.executebuiltin()in this case) with an argument.
Despite being rather simple, this example illustrates main steps of initializing PyXBMCt-based addon UI:
Set up the geometry and grid of the main window.
Place UI controls on the grid.
Connect interactive controls and key actions to functions/methods.
Set up keyboard/remote navigation between controls.
Set initial focus on a control (necessary for navigation to work).
PyXBMCt demo addon povides more compherensive example on how to use all PyXBMCt Controls.
